Learning how to build a rocking chair is one of the most rewarding weekend woodworking projects you can take on. Whether you're searching for a simple diy rocking chair plan or want to know how to make a wooden rocking chair from scratch, this guide walks you through wood selection, tools, a full cut list, and nine clear steps — no advanced carpentry degree required.
Rocking chairs are usually credited to Benjamin Franklin, though the design actually predates him. Classic rockers are known for spindle-style backrests and a smooth, arced rocking motion that hasn't changed much in over two centuries. What started as garden furniture is now a household staple, from nurseries to front porches.
In this guide, you'll learn:
- How a rocking chair's rocking motion actually works
- How to choose the right wood for indoor vs. outdoor use
- The full tool list, lumber list, and cut list for a standard rocking chair build
- A 9-step process to build a rocking chair from start to finish
- Answers to the most common rocking chair building questions
Types of rocking chairs you can build or buy:
How Does A Rocking Chair Work?

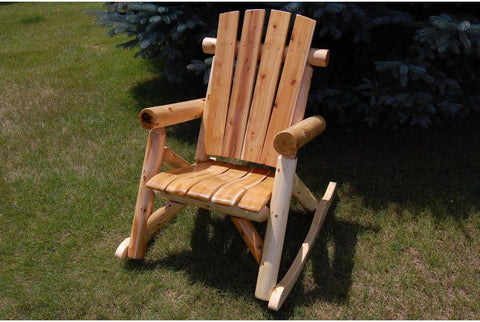
More cedar rocking chairs here
A rocking chair's smooth motion comes down to one thing: the relationship between the curve of the rockers and the chair's center of gravity.
Center of gravity, in simple terms, is the balance point of the chair-and-person system. If it sits too close to the center of the rocker's curve, the ride feels unbalanced — you'll tip too far back or too far forward. If it sits too close to the rocker's edge, the chair barely rocks at all.
For a properly balanced build, the center of gravity should fall roughly one inch in front of the sitter's belly button when seated. This is a reliable rule of thumb, though it can shift slightly depending on the chair's exact dimensions.
A well-built rocking chair should do two things:
-
Take pressure off your back — your spine stays in a neutral position while you rock
-
Create a simple, rhythmic motion — this works off nervous energy and promotes better blood flow
Choosing the Right Wood for Your DIY Wood Rocking Chair

More Hickory rockers here
Wood choice is the single biggest decision in any diy wood rocking chair project. Some woods are built for outdoor durability; others are better suited to indoor furniture. Here's a side-by-side comparison to help you decide.
Outdoor Woods Comparison
| Wood Type | Lifespan (Untreated) | Difficulty to Work With | Best For |
|---|---|---|---|
| Ipe | Up to 40 years | Hard (experienced builders only) | Maximum durability, harsh climates |
| Teak | 25–30+ years | Easy | Builders who want longevity without fighting the wood |
| Western Red Cedar | 15–20 years | Easy | Budget-friendly outdoor builds |
| Fir | 10–15 years | Easy | Affordable, beginner-friendly outdoor projects |
Ipe is a dense tropical hardwood from South and Central America. Its natural oils resist insects and fungi, and it can last up to 40 years outdoors even untreated. The tradeoff: it's very hard to cut, so it's best left to experienced woodworkers.
Teak is a premium choice with high natural oil content that repels water and pests. It resists expanding or shrinking in harsh weather and is easy enough for beginners to work with — but sourcing it is difficult, which drives up both cost and environmental impact.
Western Red Cedar is the most accessible and economical outdoor option. It resists warping, decay, and insects, and has a distinct reddish hue. Its lifespan is shorter than ipe or teak, but the price makes it a popular choice for a first diy wood rocking chair.
Fir is affordable, resists decay and insects, and won't warp — making it a solid budget pick for a straightforward outdoor build.
Indoor Woods Comparison
| Wood Type | Density | Difficulty | Best For |
|---|---|---|---|
| Mahogany | Heavy | Hard | Rich red tone, long-lasting indoor pieces |
| Walnut | Medium | Moderate | Strong, lightweight, rich brown finish |
| Ash | Medium | Easy | First-time DIY builders |
| Birch | Medium | Easy | Affordable, widely available option |
Mahogany develops a deep reddish-brown to blood-red hue over time. It's dense and better suited to experienced woodworkers, but lasts for generations when properly treated.
Walnut is lightweight yet strong, with excellent dimensional stability and a rich brown color. Its medium density makes it approachable for less experienced builders.
Ash is tough, flexible, and holds screws and glue exceptionally well — a great match for a first-time rocking chair build.
Birch is affordable, hard, stable, and widely available across the Northern Hemisphere, making it a dependable choice for beginners.
How to Build a Rocking Chair: Tools, Lumber & Cut List

A successful rocking chair build needs to hit five marks: light enough to rock smoothly, strong enough to hold weight safely, visually appealing, comfortable for different body types, and durable over time.
This build skips the traditional hand-whittled spindle backrest in favor of a slatted design — same classic look, far less work.
Finished dimensions: 31¾" tall, 35" long, 22" wide seating space Estimated cost: $50–$100 in materials Estimated build time: A full weekend (6–10 hours) for a first-timer
Tools You'll Need
-
Tape measure
-
Sander
-
Square
-
Jigsaw
-
Circular saw
-
Miter saw
-
Drill
-
Kreg jig
-
Nail gun
Lumber List
-
2 – 1×2 boards at 8'
-
3 – 1×3 boards at 8'
-
2 – 1×4 boards at 8'
-
1 – 1×6 board at 8'
Full Cut List
| Part | Quantity | Size |
|---|---|---|
| Backrest top frame | 1 | 1×2 at 16" |
| Backrest side frames | 2 | 1×2 at 18½" |
| Armrest slats | 2 | 1×3 at 2½" |
| Backrest sides | 2 | 1×3 at 21" |
| Backrest slats | 5 | 1×4 at 19" |
| Seat sides | 2 | 1×3 at 23" |
| Seat front & back | 2 | 1×2 at 17½" |
| Seat slats | 5 | 1×4 at 19" |
| Armrests | 2 | 1×3 at 22" |
| Side frame tops | 2 | 1×3 at 12¼" |
| Side frame sides | 4 | 1×3 at 24½" |
| Side frame bottoms | 2 | 1×2 at 19½" |
| Rockers | 2 | 1×6 at 35" |
Materials You'll Need
-
1¼" pocket hole screws
-
Clamps
-
Pocket hole plugs
-
Safety gear
-
Wood glue
-
Sanding supplies
-
¼" spade bit
-
1¼" wood screws
-
20 – 2" long, ¼" bolts and nuts
-
Paste wax
-
Finishing supplies (stain, paint, or varnish)
9 Steps to Build a Rocking Chair
Step 1: Cut the Backrest Top Frame and Side Frames

Using a Kreg jig set for ¾" material, drill pocket holes at each end of the backrest top frame (16"). The two backrest side frames (18½" each) attach to it using 1¼" pocket screws and wood glue. Let dry fully before moving on.
Step 2: Cut Armrest Supports, Backrest Sides, and Backrest Slats
Cut the armrest supports at a 20-degree angle. Round out the bottoms of the backrest sides, then attach them to the backrest side frame with glue and 1¼" wood screws. Attach the armrest supports the same way. Finish by securing the backrest slats to the top frame and sides with glue and wood screws.
Step 3: Cut and Assemble the Seat Sides, Front, and Back

Drill pocket holes into all ends of the seat front and back using the Kreg jig, then assemble with wood glue and 1¼" pocket screws. Cut the seat slats and attach them to the seat sides, back, and front with wood glue and 1¼" wood screws. The seat front and sides should sit flush; the back edge of the back slat should align flush with the seat back.
Step 4: Cut the Armrests and Side Frame Pieces
Cut the armrests at a 10-degree angle, and round the side frame bottoms at the same angle. Drill pocket holes into the side frame tops and bottoms with the Kreg jig, then assemble everything with wood glue and pocket screws. Repeat for the opposite side.
Step 5: Build and Attach the Rockers

This is where your chair becomes an actual rocking chair. Draw a smooth, even curve for the rockers — a radius of roughly 62½" gives the most natural motion — and cut it out with a jigsaw. The rocker should overhang the front of the chair by about 4" and slightly more at the back to allow full range of motion.
Clamp the rockers to the side frame sides, drill through with a ¼" spade bit, then secure with wood glue plus ¼" bolts and nuts. Sand away any excess wood.
Step 6: Attach the Backrest
Stand the chair upright and clamp the backrest to the side frame assemblies. The armrest corner should sit flush with the back edge of the backrest side, resting on the armrest support. Drill through with the spade bit and secure with wood glue plus ¼" bolts and nuts. Repeat on the other side.
Step 7: Stain, Paint, or Varnish

Quick look at 2 classic rocking chairs and 1 end table
Check that the chair sits evenly and rocks smoothly before finishing. Then apply your stain, paint, or varnish of choice depending on the look you're going for and whether the chair will live indoors or outdoors.
Step 8: Decorate
Add cushions, a throw pillow, or a blanket for comfort. A small side table or basket nearby keeps books, coffee, or extra throws within reach.
Step 9: Enjoy Your Finished Rocking Chair
Your DIY rocking chair build is complete. Grab a book, sit back, and enjoy something you built with your own hands.
Frequently Asked Questions
How long does it take to build a rocking chair?
Most first-time builders finish a standard rocking chair in a single weekend — roughly 6 to 10 hours of hands-on work, plus drying time for glue between steps.
What is the best wood for a DIY rocking chair?
For outdoor rockers, Western Red Cedar offers the best balance of durability and affordability for beginners, while ipe and teak last longer but cost more. For indoor builds, ash and birch are the easiest for first-timers to work with.
How much does it cost to build a rocking chair?
A standard DIY rocking chair typically costs between $50 and $100 in materials, not including finishing supplies like stain or varnish.
What tools do I need to make a wooden rocking chair?
You'll need a tape measure, sander, square, jigsaw, circular saw, miter saw, drill, Kreg jig, and nail gun — plus clamps and basic safety gear.
Can a beginner build a rocking chair?
Yes. Using softer, easier-to-work woods like cedar, ash, or birch, along with a Kreg jig for pocket-hole joinery, makes this a manageable project even for first-time woodworkers.
What's the right size for a rocking chair?
A standard rocking chair is typically around 31¾" tall, 35" long, with about 22" of seating width — comfortable for most adult body types.
Conclusion
Building your own rocking chair takes patience, but the nine steps above break it into a manageable weekend project. If you'd rather skip the sawdust, shop our full collection of rocking chairs — handcrafted, American-made, and ready to ship.
Before you go, take a quick look at our: